
How to Install Trolling Motor on Pedal Boat: If you’re a fan of the traditional pedal boat propulsion system, then we’re in different boats. Though I appreciate the simplicity of solely relying on leg effort, it can be super tiring, especially if you’re out on a lake for a long outing.
Luckily, there’s a solution to give your leg a break and enjoy the water splashes being hand and leg free. And that’s how to install a trolling motor on pedal boat.
Though installing a trolling Motor on a paddle boat is quite simple, still it’s essential to know the proper instructions and to follow the proper steps for hassle-free installation. Here’s how to do so:
- Gather the Necessary Equipment
- Prepare the Pedal Boat for Installation
- Mount the Trolling Motor in the Right Place
- Install Battery and Wire Appropriately
- Connect Circuit Breaker
Let’s see each installation step in detail and troubleshoot common issues in the article.

Where Trolling Motors Can be Installed on Pedal Boat?
No doubt, installing a trolling motor on a paddle boat can provide you with the opportunity to enjoy water ventures without the need to put in leg effort. NGL, it’s exhausting for someone like me who frequently goes
However, you need to figure out the best place where a trolling motor can be installed on a pedal boat in order to achieve a seamless lake ride firsthand.
Primarily, the appropriate location to install a trolling motor comes down to what type of motor you’re going to install. For your ease, I have outlined below the best locations to install a trolling motor on pedal boat, considering its various types.
- Bow Mount: Front of the boat with a bolt-on bracket.
- Stern Mount: Rear of the boat with a specific fastening mechanism
- Transom Mount: Back of the boat with clamp-on bracket
How to Install Trolling Motor on Pedal Boat Explained
Converting your pedal boat to electrical water is a piece of cake. With the right equipment and some basic know-how, you’ll be cruising around the water in no time.
Here’s a step-by-step guide on how to install trolling motor on pedal boat:
Gather the Necessary Equipment Beforehand
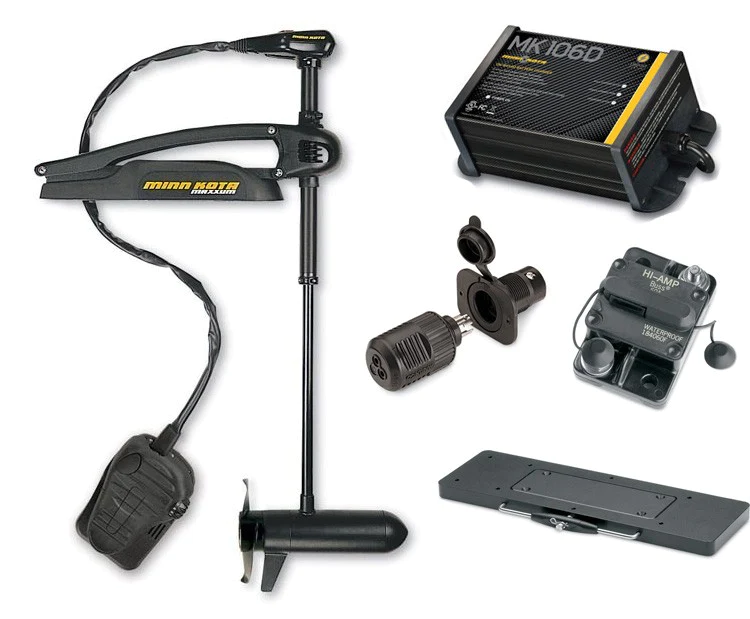
First up, gather all the necessary equipment before you begin. You’ll need the following tools:

- Trolling motor: Choose a motor suitable for your pedal boat’s weight capacity and size.
- Mounting bracket: Look for a sturdy and adjustable bracket designed specifically for your pedal boat model.
- Battery: Select a marine battery with sufficient power to operate the trolling motor.
- Battery box: Get a weatherproof battery box to protect the battery from water and other elements.
- Wires and connectors: You’ll need appropriate gauge wires, connectors, and terminals to connect the motor and battery.
- Circuit Breaker: Select the right power circuit breaker in order to prevent any mishap.
Prepare the Pedal Boat for Installation
Now that you’ve got your gear ready, it’s time to prepare your trusty pedal boat.
To get started, remove any floating debris or random items cluttering the deck and thoroughly clean your vessel. After all, you wouldn’t want your motor getting tangled up in a web of mystery objects.
It’s also essential to choose an area that is stable and can support the weight and vibration of the trolling motor. If your mind is caught in confusion, simply go through the locations I mentioned earlier.
Mount the Trolling Motor in the Right place
Next, you will need to mount that beast! Carefully follow the instructions provided with your mounting bracket, making sure it’s securely fastened to the chosen location.
Also, adjust the bracket to find the sweet spot for your trolling motor’s depth and angle. You want it to glide through the water like a swan, not awkwardly splashing around like a confused duck. Isn’t it?

Most importantly, don’t forget to tighten those screws like a pro to keep everything in place.
Install Battery and Wire Appropriately
Now comes the electrifying part; installing the battery and wiring, and it is a bit technical. But, not to worry, as I’ve explained each step individually.
Start off by connecting the battery to the motor using appropriate gauge wires and connectors. And to protect the battery from water and other elements, use a weatherproof battery box.
In addition, you must follow the manufacturer’s instructions for proper wiring. Plus, double-check all your connections to ensure they are tight and reliable.
Connect Circuit Breaker
Lastly, you’ll need to connect the circuit breaker in line with the positive wire coming from your battery. The circuit breaker acts as a safeguard, automatically cutting off power in case of an overload.

Though your manufacturer has mentioned the power of the circuit breaker that’s compatible with the specific trolling motor, you can consult my chart below in case it’s missing.
| Thrust | Circuit Breaker (AMP) |
|---|---|
| 30, 40, 45 lbs. | 50 Amp @ 12 VDC |
| 50, 55 lbs. | 60 Amp @ 12 VDC |
| 70 lbs. | 50 Amp @ 24 VDC |
| 80 lbs. | 60 Amp @ 24 VDC |
| 101 lbs. | 50 Amp @ 36 VDC |
| Engine Mount 101, 112 lbs. | 60 Amp @ 36 VDC |
| Talon Shallow Water Anchor, Raptor Shallow Water Anchor | 50 Amp @ 12 VDC |
That’s all. Isn’t it too easy?
However, you should follow all safety precautions and guidelines provided by the manufacturer throughout the installation process. It must be written on the user manual or on the box.
Additionally, be mindful of the weight distribution on your pedal boat and avoid overloading it with excessive gear, as it is an important thing to focus on.
Important Add-Ons to Make the Installation Process a Breeze
Here are a few major add-ons that can make the installation process easier:
- Batteries
- Terminal Ends
- Battery Charger
- Jumper Wire
- Drill bits
- Bolts or screws
- Retaining nuts
- Rubber washers
- Wrench or screwdriver
Is There a Kit to Put a Trolling Motor on My Pedal Boat?
There is no all-in-one kit designed to attach a trolling motor to a paddle boat. But thankfully, there are ways to make the process easier.
When searching for a trolling motor, opt for one with a versatile screw-style clamp mount. This ingenious design allows you to secure the motor onto various surfaces, adapting to the unique shape of your pedal boat.
With a few twists and turns, you can firmly fasten the motor, granting you the freedom to explore the waterways like never before.
If you prefer simplicity, investing in a pedal boat that comes pre-fitted with a trolling motor should be your best bet.
These purpose-built boats are designed to seamlessly incorporate a motor, sparing you the trouble of mounting and compatibility concerns.
Troubleshooting Common Issues and Finding Solutions
When transforming a pedal boat into an electric-powered vessel, there are a few challenges that need to be addressed. These challenges are not exclusive to pedal boats but rather the common hurdles that you may encounter during a trolling motor installation.
Here are some common issues and their solutions:
Motor Mounting
If your pedal boat doesn’t come with a pre-installed motor mounting location, you have the option to create your own mounting position. While this can be a bit challenging, it provides the flexibility to use trolling motors with different mounting styles and higher thrust options.
To do this, you would need to fabricate a mounting position. One approach is to purchase or create a steel trolling motor mounting plate and securely bolt it through the back end of your boat. Once the mounting plate is in place, you can easily bolt your motor onto it.
Battery and Wiring
If you’re looking to transform your pedal boat into an electric-powered wonder, you’ll need to find a reliable power source. Don’t worry, though.
Let me steer you in the right direction.
When it comes to small trolling motors, they usually play nice with class 27 or 29 batteries.
Now, you’ve got two choices here. The top-notch option is snagging yourself some deep-cycle marine batteries. They’re worth your hefty investment in terms of power and longevity.
However, if you’re on a tight budget, you can always swing by Walmart and grab some more pocket-friendly alternatives.
Reaching the Boat
When it comes to turning a pedal boat into an electric one, there’s a big challenge: reaching the motor, especially in larger boats. Usually, electric pedal boats have a battery compartment in the middle and a handy throttle you can easily reach.
But if you decide to add your own trolling motor, things get trickier. The throttle and steering are usually way at the back, almost impossible to reach from the front.
So, what can you do? Well, you’ve got a few options: go for a smaller boat, have someone in the back operate the trolling motor, or extend the controls so they’re within reach from the front seats. It’s all about finding the right solution for you.
Trolling Motor Shaft Length Guide
Choosing the perfect shaft length for your trolling motor is like finding the right balance between performance and convenience. It’s a critical decision that can make or break your boating experience.

Here are some tips to help you choose the right shaft length for bow Mount motors:
- For bow mount motors, measure the distance from the horizontal mounting point on the bow to the waterline.
- Add 20 inches (or 24 inches for Ulterra motors) to this measurement to determine the minimum recommended shaft length.
- If you frequently go to pedal boat fishing in rough waters, add an extra 5 inches to the recommended length to keep the propeller submerged.
- For the standing operation of hand-controlled motors, add 12 inches to the recommended transom lengths for easier and more comfortable steering.
While the requirements are not as strict for transom mount motors compared to bow mount motors, it’s wise to double-check the shaft length.
Pro Tips for Putting Trolling Motors on Pedal Boat
Here are a few major tips that I never skim off while installing a trolling motor on the pedal boat:
- Choose the right trolling motor for your boat.
- Plan the wiring route, avoiding sharp edges and water exposure.
- Use the appropriate wire gauge for efficient power delivery.
- Seal wire connections with marine-grade electrical tape or heat shrink tubing.
- Test the motor and control unit for proper functionality.
Remember, safety should be your top priority.
Wrapping Up
To sum up, installing a trolling motor on a pedal boat is like unlocking a world of possibilities on the water. From navigating tricky currents to exploring distant shores, the trolling motor provides you the freedom to go effortlessly wherever your heart desires.
FAQs – How To Install Trolling Motor On Pedal Boat
Can I install a trolling motor myself?
Yes, you can install a trolling motor yourself with basic knowledge and tools. However, you need to follow the manufacturer’s instructions, ensure proper mounting, and connect the wiring correctly for safe and effective operation.
Can you put a trolling motor on any boat?
In general, trolling motors can be installed on most boats. However, you need to ensure your boat has a suitable mounting location, sufficient space, and an appropriate structure to support the motor’s weight and movement without causing damage.
How much does it cost to set up a trolling motor?
The cost of setting up a trolling motor varies depending on the motor’s quality, power, and features. Basic models can start around $100, while more advanced options can range from $300 to $1,500 or more.
How do I wire the trolling motor to the battery?
To wire a trolling motor to a battery, connect the motor’s positive and negative leads to the corresponding terminals on the battery. Use appropriate wire gauges, fuses, and connectors, following the motor and battery manufacturer’s instructions.
How do I choose the right thrust for my pedal boat?
When choosing the right thrust for a pedal boat, consider factors like the boat’s weight, size, and intended use. As a general guideline, select a trolling motor with a thrust ranging from 2 to 2.5 pounds per 100 pounds of total weight for efficient propulsion.

Jack Bennett, a passionate pedal boating enthusiast, and marine engineer by day, is here to share my knowledge and love for this exciting sport with you all. Happy Boating!